Project-Level Annotations
Project-level annotations allow you to add event details and visual markers to your Content Inventory to easily comment on what took place as well as track how they might have influenced your content health
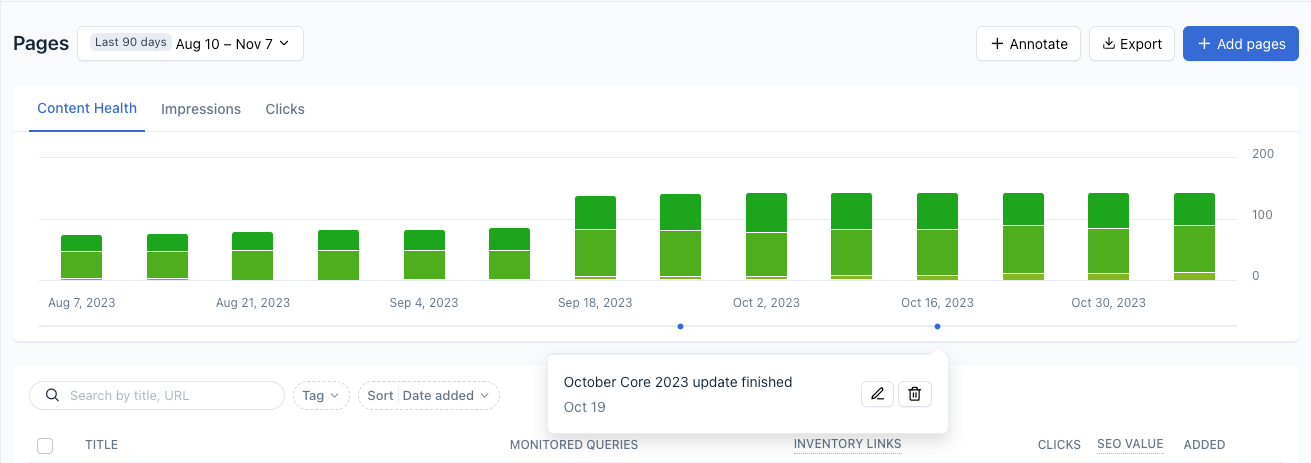
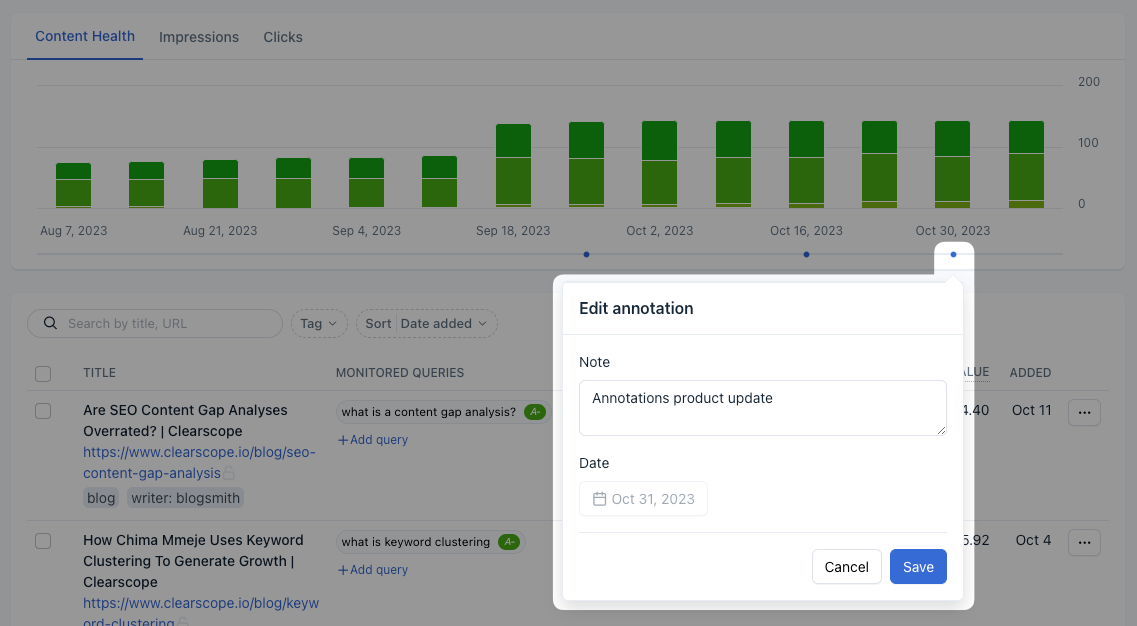
Project-Level Annotations are available on the Content Health chart located in Content Inventory. You can add, edit, and delete annotations at both the project and page levels.
How do I add, edit, and delete Project-Level Annotations?
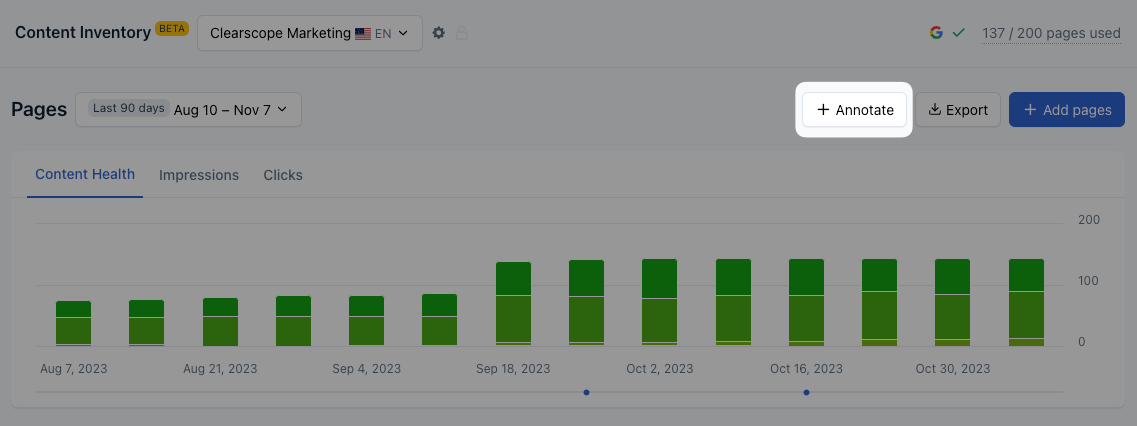
1. Go to your Content Inventory screen and click the “+ Annotate” button
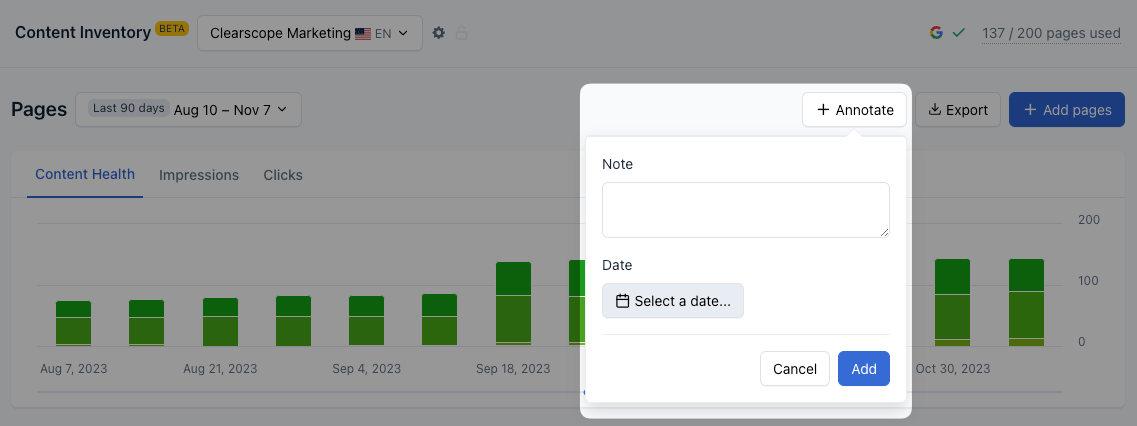
2. A box will appear for you to enter details for your annotation in the “Note” text box and the corresponding date from the calendar drop-down. Select the “Add” button when finished.
3. You will see your annotation appear beneath the weekly bar graph corresponding to the date you entered
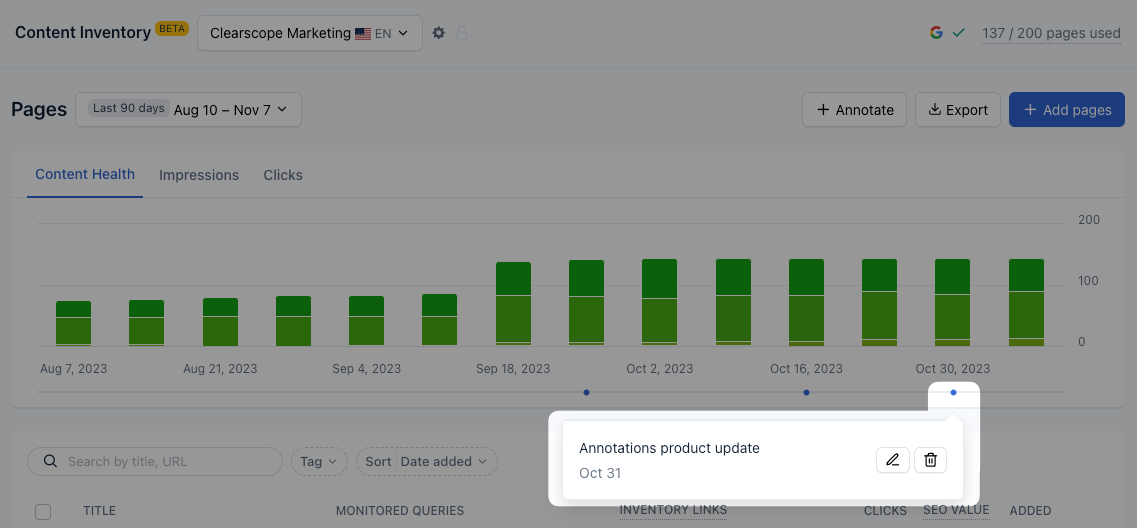
4. To edit an annotation, select the icon of the pen writing. Make any adjustments to the annotation and select the “Save” button.
5. To delete an annotation, select the trash can icon. That annotation will be removed from your Content Health chart as a result.